Do you want to be informed on new Posts on this Thread? (members only)
| S&S Swan Maintenance - Varnishing our Swans (Wood) |
|---|
|
Join Date: 29 January 2007
Posts: 1019 |
||
|---|---|---|
|
Varnishing our Swans (Wood) 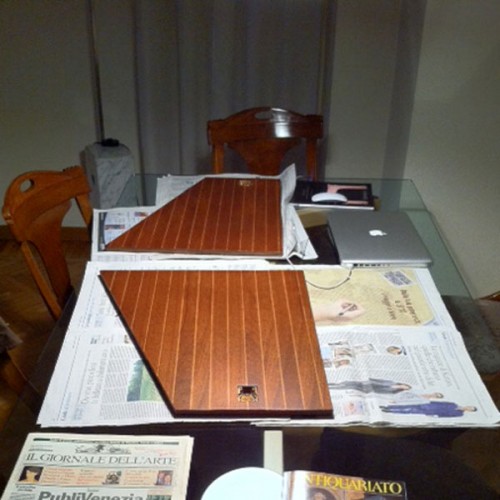 |
|
Join Date: 30 January 2007
Posts: 461 |
||
|---|---|---|
|
Great post Matteo!!! |
|
Join Date: 05 February 2007
Posts: 102 |
||
|---|---|---|
|
Dear Daniel and All, apologize for the less than perfect translation, but was under the influenze of solvent and Epifanes fumes and so there are some pretty elementary errors...next time will proof read before sending! Promise. And Daniel, will let you know if these wonderful instructions are enough for those of us who are somewhat negated in the art of varnishing:-) Coat #4 tomorrow...
All the best! |
|
Join Date: 29 January 2007
Posts: 1019 |
||
|---|---|---|
|
Dear Friends, 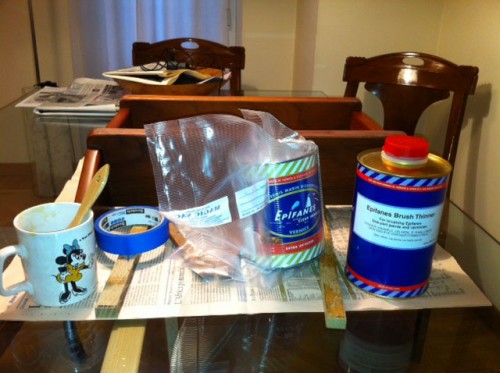 |
|
Join Date: 02 February 2007
Posts: 202 |
||
|---|---|---|
|
Hello everyone! This is definitely an interesting topic. I also came to the conclusion that epiphan satin finish is the best, but I have a question. As far as I remember one is supposed to put only two coats of satin finish maximum (per epiphane instruction booklet). Matteo, reading your very interesting recipe I see that you apply as much as eight coats. Does that mean 6 glossy plus two satin?? Kind regards. Philippe 41/022 |
|
Join Date: 29 January 2007
Posts: 1019 |
||
|---|---|---|
|
Dear Philippe |
|
Join Date: 16 May 2009
Posts: 252 |
||
|---|---|---|
|
For anyone who has trouble getting the Epifanes in the States, first of all, Jamestown Distributors sells it. I also wanted to offer that Interlux Schooner high gloss as well as the Interlux Gold Spar Satin, both work beautifully. Tom Dillon in San Diego did the interior of my boat with these varnishes and it is gorgeous....it is a different product, in that sanding is needed between coats, but the cleaning as Matteo highlighted is critical. The Interlux website where they post these varnishes has a very complete set of step by step instructions for how to lay the varnish on. These varnishes are also higher cost, but in life often you get what you pay for. The pictures show a little of the finish, but in person, it really is super nice, better than the photos. My floorboards are a high build, gloss finish.    |
|
Join Date: 29 January 2007
Posts: 1019 |
||
|---|---|---|
|
Dear Geoff |
|
Join Date: 05 February 2007
Posts: 102 |
||
|---|---|---|
|
Dear All, in such a serious world these days here's a few lines to perhaps give a chuckle or two regarding varnishing our precious boats: |
|
Join Date: 02 February 2007
Posts: 202 |
||
|---|---|---|
|
Hello Jane. I will be very happy to meet you at the rendez-vous, may I say that I love your sense of humor! An important point should be mentioned: do not use pure Epiphane varnish. It should absolutely be diluted with white spirit. On a 60/40 basis to start with, then progressively going down to 90/10 for the last coats. If you do that varnishing is an entirely different exercise! Must agree with you about dust, and smell, though! Kind regards. Philippe |
|
Join Date: 05 February 2007
Posts: 102 |
||
|---|---|---|
|
Hi Philippe, |
|
Join Date: 27 January 2011
Posts: 140 |
||
|---|---|---|
|
More to Epifanes here: http://www.epifanes.com/qanda.htm |
|
Join Date: 28 July 2008
Posts: 79 |
||
|---|---|---|
|
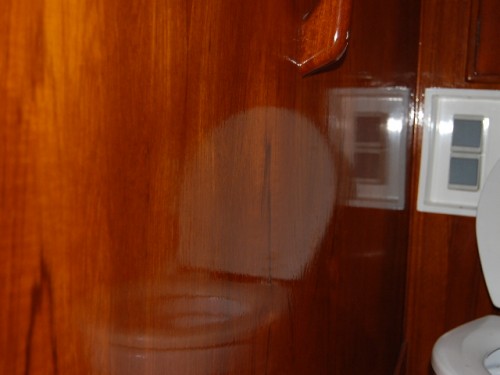
Our dinning room has been graced by TIDERACE II�s floorboards and saloon table over the past few winters. Even I must admit that the novelty of the house smelling of Epifanes wore off after a while; but the results are good, even if I found I needed the patience of a saint to achieve a finish I was happy with! (Following a very similar approach to those above) My query that I hope you can help me with is this. Parts of the interior have various black marks that appear to be ingrained in the wood where the varnish has started to deteriorate. I have tried rubbing with white spirits and this does remove some of it, but certainly not all. What are these black marks? And more importantly can they be removed? A fair amount of the interior woodwork now needs varnishing, with careful sanding will this remove the black marks or is the wood permanently marked? We have owned TIDERACE II for almost 6 years now and in that time have concentrated our efforts and the bank managers money in getting her to a �sailable� state as we would like, specifically ignoring the cosmetics; perhaps too much? Your thoughts much appreciated. Adrian TIDERACE II |
|
Join Date: 13 March 2008
Posts: 16 |
||
|---|---|---|
|
HI,
 |
- Threads : 1702
- Posts : 10217
- Members: 821
- Online Members: 1