Sicaflex / Silicone on keel on a 44' Hi to everybody ,
We have hauled Pippus for the yearly maintenance and anti fouling painting.
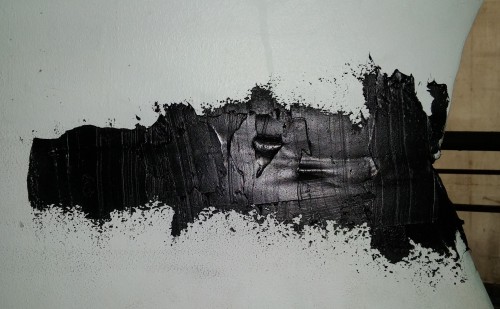
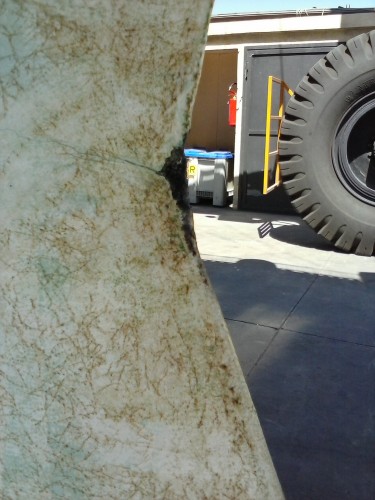
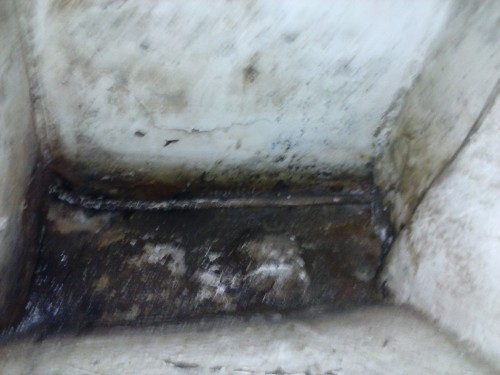
Before washing out the previous International anti fouling we noticed a small crack an the back side of the upper side of the keel.
After washing with water pressure on both side a 5x20cm line of elastic material (Sicaflex or Silicone) appeared .
Anyone knows what is for? And better take it off or let it there?
Dear Alberto
The elastic material is put on for hiding a crack, but the antifouling is not elastic, and will crack as shown. The recommendation is to tighten the aftermost keel bolts so that the crack disappears, and remove the elastic material.
What size is the washer for the aftermost bolts? May need to be larger.
There are 17 off M24 keel bolts, the recommended torque is 172 Nm with threads greased, 252 Nm with threads not greased.
Kind regards
Lars
Dear Alberto
Thank you for the photo.
The keel bolts are glassed over and the surface painted with brown topcoat.
For what to do after tensioning them pls see my post to Porttack dated 17July 2014.
Kind regards
Lars
Dear Alberto
Find it hard to believe that your boat would have fewer bolts than the others. Pls check again, and consider that there are 6 pairs.
Would not be necessary to tighten the bolts in uncracked keel areas if you want to minimize the amount of work.
Kind regards
Lars
I believe it was the professor who quite some time ago put forth the idea of using a hole saw without the pilot to get to our glassed in nuts, rather than chipping or grinding away at the fiberglass cover.
I highly recommend this technique as I have replaced virtually every fastener on Hatha.
The cracks on Hatha were almost identical to yours. I don't think you can ever completely get rid of them.
This time around I tightened the bolts, the aft ones were loose, and with the boat hung I ground a small, about 3mm at most, groove in the joint and packed with 5200. (If you do this, be tidy, you cannot sand the 5200), then faired everything over.
This time I am trying out an Interlux silicone bottom paint, and hope that maybe it is flexible enough to bridge the keel to hull joint. So far so good on that, 1 1/2 years later.
I seem to recall when I attacked the osmosis problem about 25 years ago, that there was about a 25 mm void at the front of the keel to hull joint. I cleaned out the old filler and replaced with a small piece of foam then filled, glassed, and faired over. No problems since.
By the way, my wife and I really enjoyed the video you produced, at some point we will do something similar.
Tony,
In your experience about loosen bolts of the keel, did you log water coming from the keel?
I think that until a water ingress in the bilge is not observed there's no problem.
Do you agree?
A very small amount of water weeped from the cracks when the boat was hauled out, I don't recall it being rusty. I do not believe water made its way into the bilge but cannot be 100% positive because I did not monitor that when the boat was in the water. In hindsight it might have been a good idea to check for leaks outside when scrubbing the bilge while the boat was hauled out.
Hi to all members,
countercurrent to the common wish that boats are used more in the summer, as every year, I've hauled Pippus for the seasonal maintenance. ;)
So here I wish to share with you and have your feed-back about the job done on Pippus last week to resolve the resultant space between keel and bulb.
I emphasize that the solution of the problem is not just for structural-aesthetic reasons but water inlet from the keel.
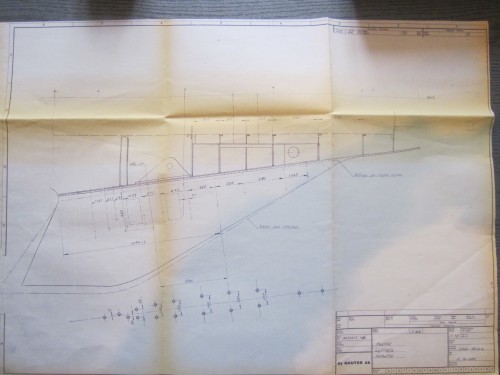
I've even met Yves LeCornec from Nautor France in Villefranche to have his suggestions and especially the drawing of the bulb with nuts and studs that I enclose for other 44's owners. He was surprised that sea water can get from the keel bolts even more because I told him the nuts were completely covered by epoxy layers. He suggested me as Lars did, to check the tightening torque of the bolts but do not even think to remove the bulb from the keel. He faced serious problem with Classic Swans where the bulb couldn't be removed from the keel with all the nuts removed!
So I've followed his and Lars's advises in previous posts as well that one dated 2010 "Swan 44 Keel Crack" .
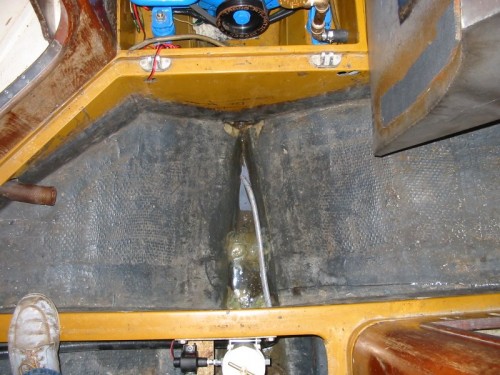
We hauled and dismasted Pippus, we filled of water the bilge aft side to check where the water would find its way out and we verified that was from the extreme aft side.
The forward side of the bulb/keel crack in fact was very very light.
Step by step our work:
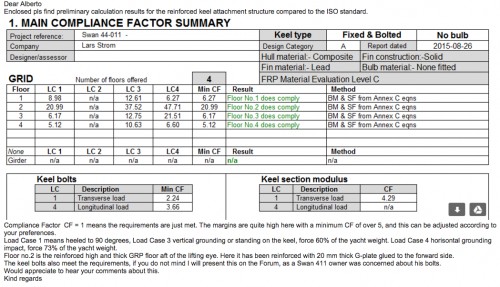
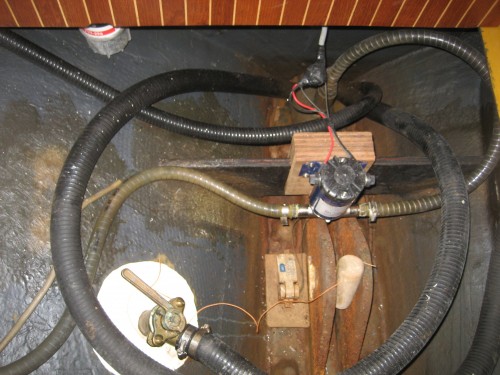
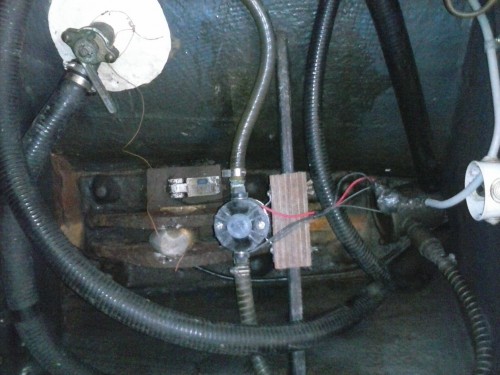
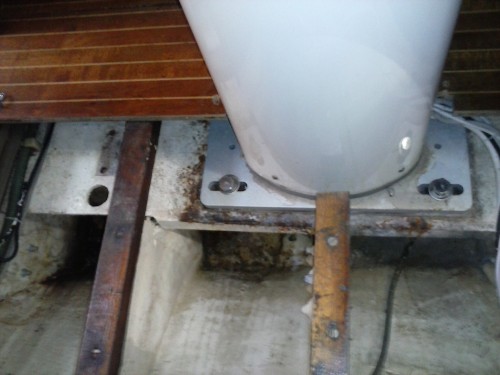
1. we took away the diesel tank and then the epoxy over each nut. With surprise we discovered bolts M25 and not M24 as they should be. (Is that the proof that someone worked on it Lars?) so we used a 41 socket wrench instead 36.
Unfortunately the 4 most forward nuts cannot be tightened by a dynamometric tool because too long to fit into the narrow space under the support steel mast frame. (Lars how can Nautor tighten them in such a narrow space?)
2.we let the bulb free suspended.
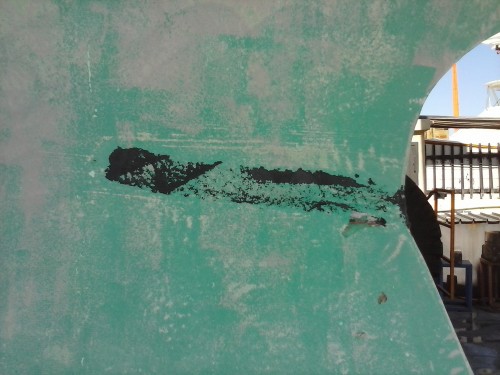
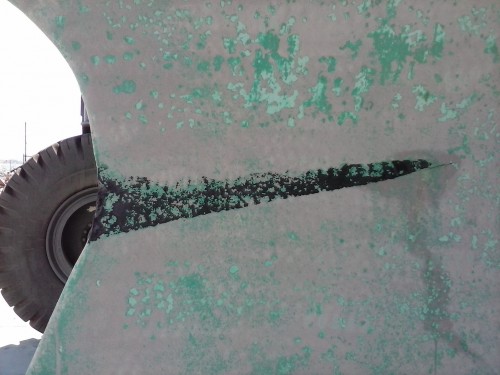
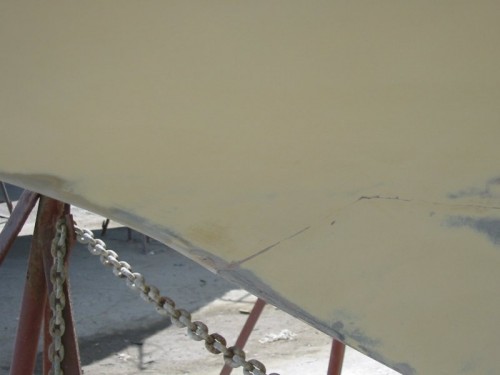
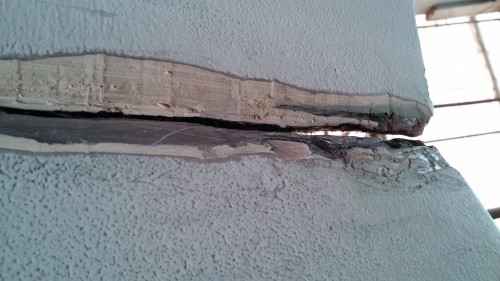
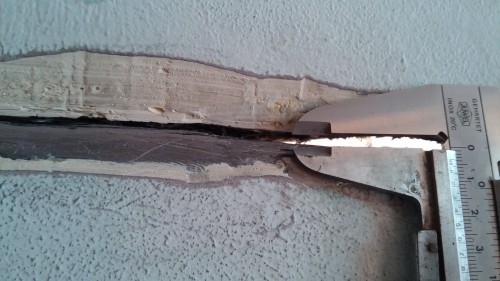
3.we cleaned up all the crack from old mastic or silicon in order to check how was underneath.
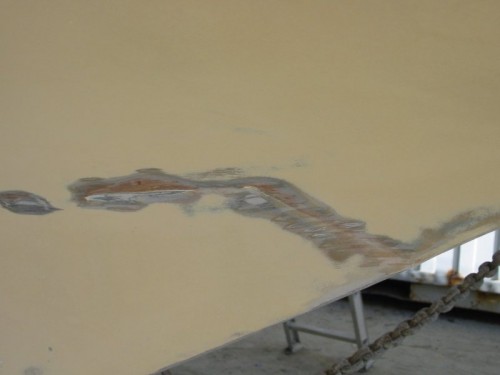
We found a 150mm "shark mouth" where the greatest distance between bulb and keel was 4mm (see pics) in the aft final side of the bulb . Unfortunately in the past someone else worked on that because the bulb upper side is very ragged and thin (see pic) where it's very difficult almost not possible to adhere perfectly as we expected.
4. we applied new Sycaflex 291i as best as we could.
5.we leaned back the bulb in order to tighten the nuts using a dynamometric tool at 265Nm (Lars's suggestion was 260Nm with no greased nuts). Only one was really loosen (one of the 2 nuts on the aft side of the hanging point). All the others were already tightened.
In september Pippus will start sailing and we will be anxious to understand significant improvements. If not I don't know really what to do more. Maybe praying? Lars?
Dear Alberto
Thank you for the information.
Nautor used special tooling for the forward bolts.
On the drawing you attached it can be seen that the aftermost keel bolt is some distance forward of the aft end of the keel. This means that it is not very effective for closing the crack aft, and the stiffness of the transverse floors forward of the fuel tank and at the aft end of the saloon needs to be improved for reducing the amount of flexing in the bottom structure. I can provide instructions for this if required.
As pointed out earlier it is advisable to seal the keel bolts with mastic from the inside right down to the lead when the nuts and washers are removed.
I would appreciate if you send me the drawing, as shown it is too small to see the details.
Kind regards
Lars
Dear Lars,
following up to your precious suggestions received in August while working on the bolts keel of Pippus I can confirm you that entry of sea water has much more reduced. While in harbour the bilges are almost dry. While in navigation we've got still some water coming in.
So after some long autumn sailings I intend to solve the flexion of the keel/hull that you underlined with your suggestions and calculations in stiffening the transverse forward floor of the fuel tank.
In Antibes I've meet a good specialist in structure working and We are planning to reinforce that transverse.
The first question is if your suggestion of gluing a 20mm thick plate take is considering a standard hand made stratification or under a vacuum process. With this last method we could reduce the plate to 10-12mm its thickness. Do you agree?
Dear Alberto
The suggestion was to use G-plate, which is a strong material manufactured under high pressure, pls see
http://www.matweb.com/search/datasheetText.aspx?bassnum=PGLAM04
Suggest you aim for the same strength and buckling safety.
Wishing you and all Forum readers a Merry Christmas and a Happy New Year!
Lars

.jpg)